4 Easy Steps to Edit Astrophotography in Lightroom
In the last week's tutorial, we went through Four Easy Steps to Capture Beautiful Astrophotography Landscapes. This week we follow through with how to edit your astrophotographs. Next week I'll write how to edit dual exposure astrophotography, so stay tuned and subscribe to my email list if you haven't already!
The photograph we are editing here was shot with the Nikon Z 7 and Sigma 20 mm f/1.4 lens. With ISO 8000, f/1.6, and 25 seconds exposure.
Like I wrote last week, if you expose the picture more, it gives you more room for editing in Lightroom. Pulling the shadows is much more challenging when you use high ISO settings. So, don't underexpose your images.
These settings were made with my EPIC Preset Collection, but you can follow along and make those changes by yourself. The EPIC Presets makes your workflow faster with an entire section dedicated to night photography.
Free Night Photography Guide
Learn the essential settings and gear I use in the dark.
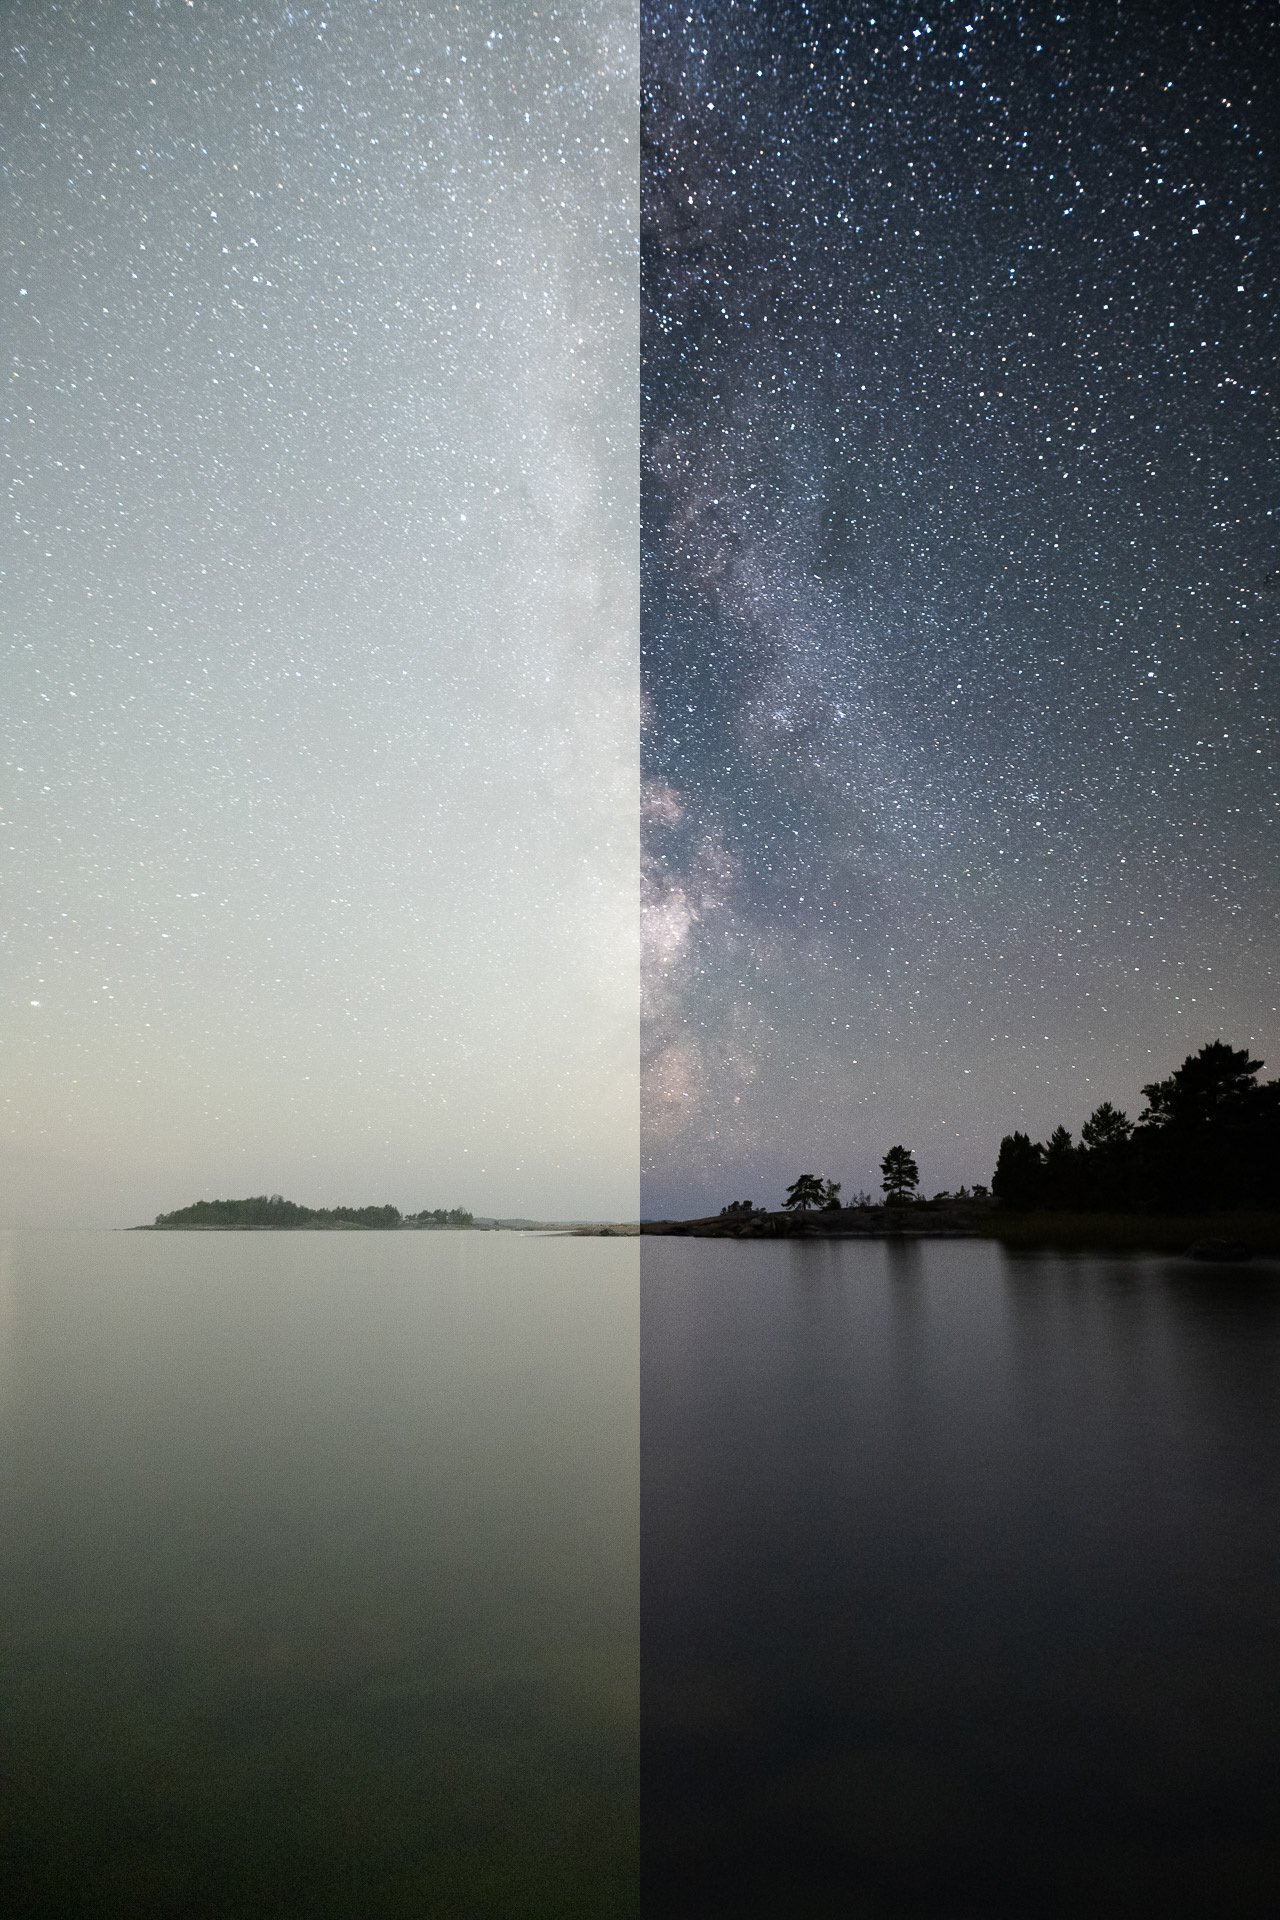
Before & After astrophotography editing Lightroom CC
1. Basic Settings
Let’s emphasize the Milky Way and darken the image to look more like a night photo with the basic settings.
Temp 4200
Tint + 28
Exposure – 1,06
Contrast + 12
Highlights + 7
Whites + 40
Texture + 14
Clarity + 6
Dehaze + 24

2. Tone Curve
Darken the image more with the tone curves. Two points, top and bottom middle in the curves.
Input 188 – Output 180
Input 93 – Output 75


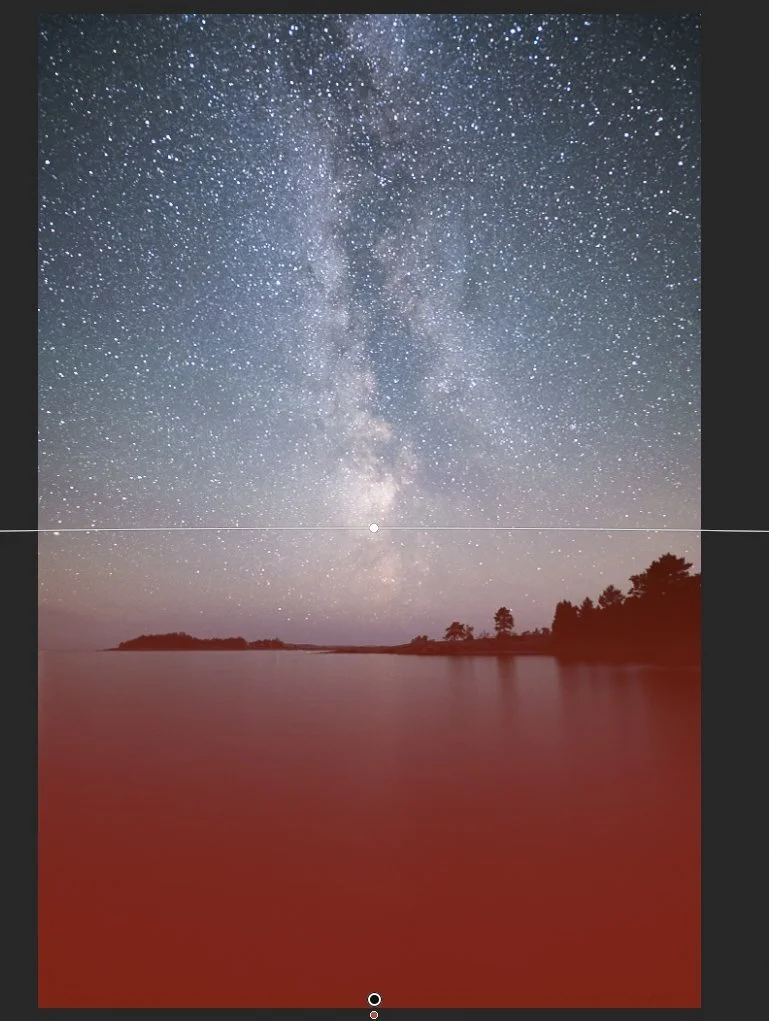
3. Graduated Filters
With the graduated filters, let’s apply light to the foreground and add contrast and detail to the sky. Because it's a simple photograph, we can use two graduated filters. The shortcut for the graduated filter is M.
If you feel fancy, you can also use the Select Sky feature, which works quite well for night photographs most of the time.
Foreground graduated filter
Place this filter in the bottom part of the frame. Using Temp and Tint, we try to match the overall colors in the image.
Temp – 14
Tint 4
The following basic settings boost the foreground brightness.
Exposure 0,67
Contrast 8
Highlights 5
Shadows 5
Whites 20
Blacks 4
For this particular image, we don't need more detail in the foreground. To apply a smoother look, use the following settings.
Texture – 4
Clarity – 14
Dehaze – 14
Lastly, let's make the saturation lower and apply a noise reduction.
Saturation – 11
Noise 25

Milky Way graduated filter
Emphasizing the Milky Way is easy. Use the following settings if you don't have to boost it a lot.
Exposure – 0,67
Highlights 24
Whites 15
Clarity 9
Dehaze 10
Noise 16


4. Final adjustments
Apply a lens correction if you have a lot of distortion in your astrophotograph. When working with high ISO photographs noise reduction is essential. I don’t usually add much sharpening for astrophotography because it can create more noise.
Sharpening
Amount 50
Radius 1,2
Masking 10
Noise reduction
Luminance 15
Detail 45
Contrast 15
Post-Crop Vignetting
Vignetting is something I tend to add in the final stages of my editing workflow.
Highlight Priority
Amount – 9
Feather 100
Highlights 100
Grain
By removing a lot of noise, it’s good to add some grain so you don’t end up with a photograph that looks overly smooth.
Amount 9
Size 10
Roughness 9
Here is the final edit.

Below are two different versions made with the EPIC Preset Collection.
Tools & tutorials used in this tutorial
Lightroom CC Classic
EPIC Preset Collection
Star Photography Masterclass
Did you find the tutorial helpful? I would love to hear from you; what would you like to see more here on my blog!
Until next time my fellow photographers, take care and keep on creating!